

3256805872621534
$182.62 NZD
or 4 payments of $45.66 with

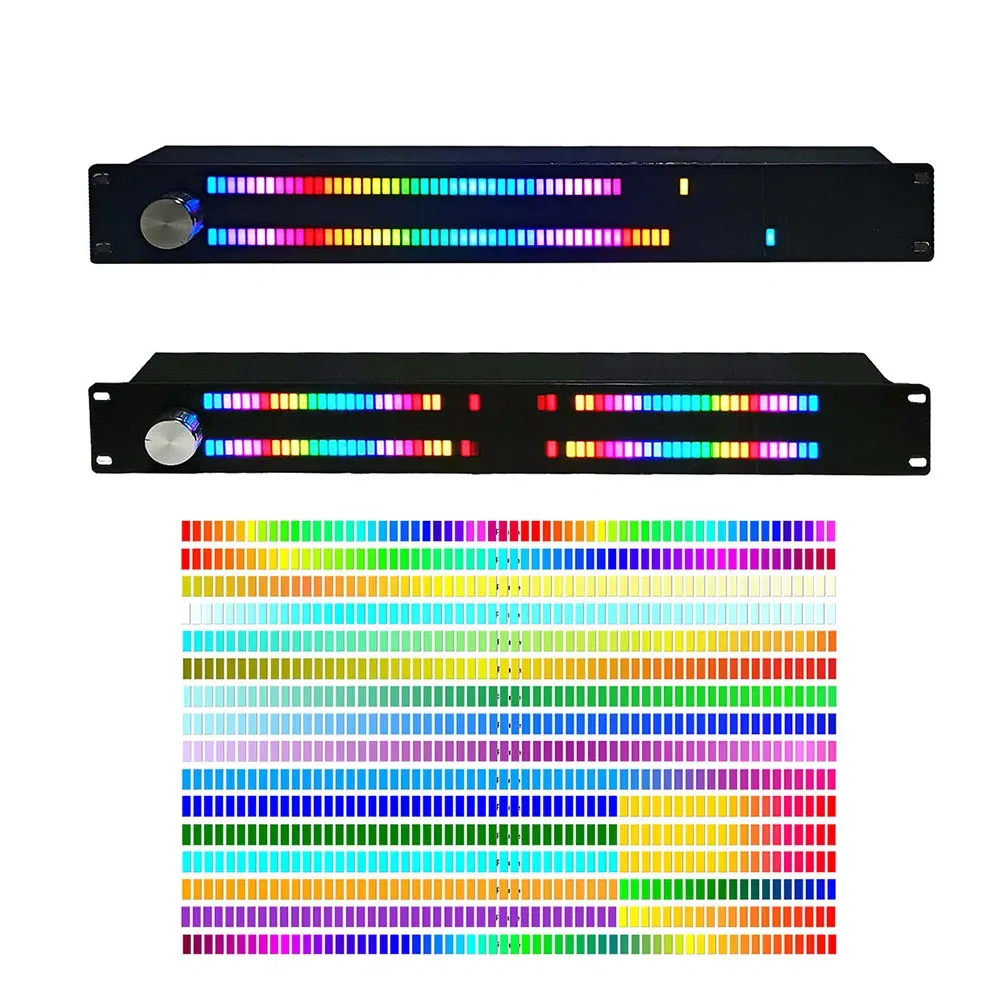
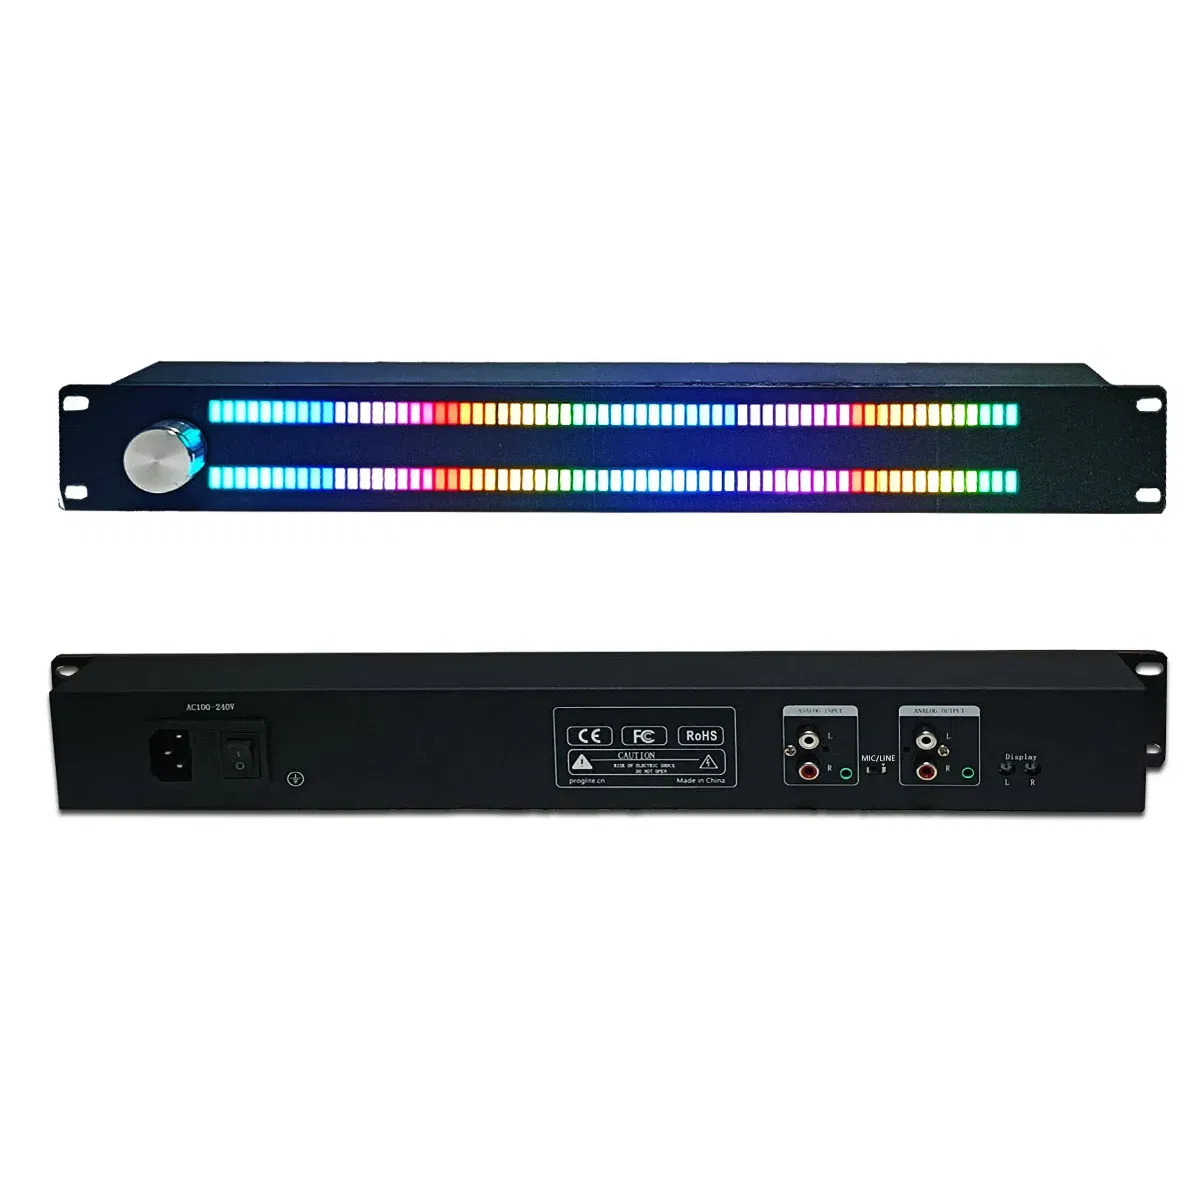
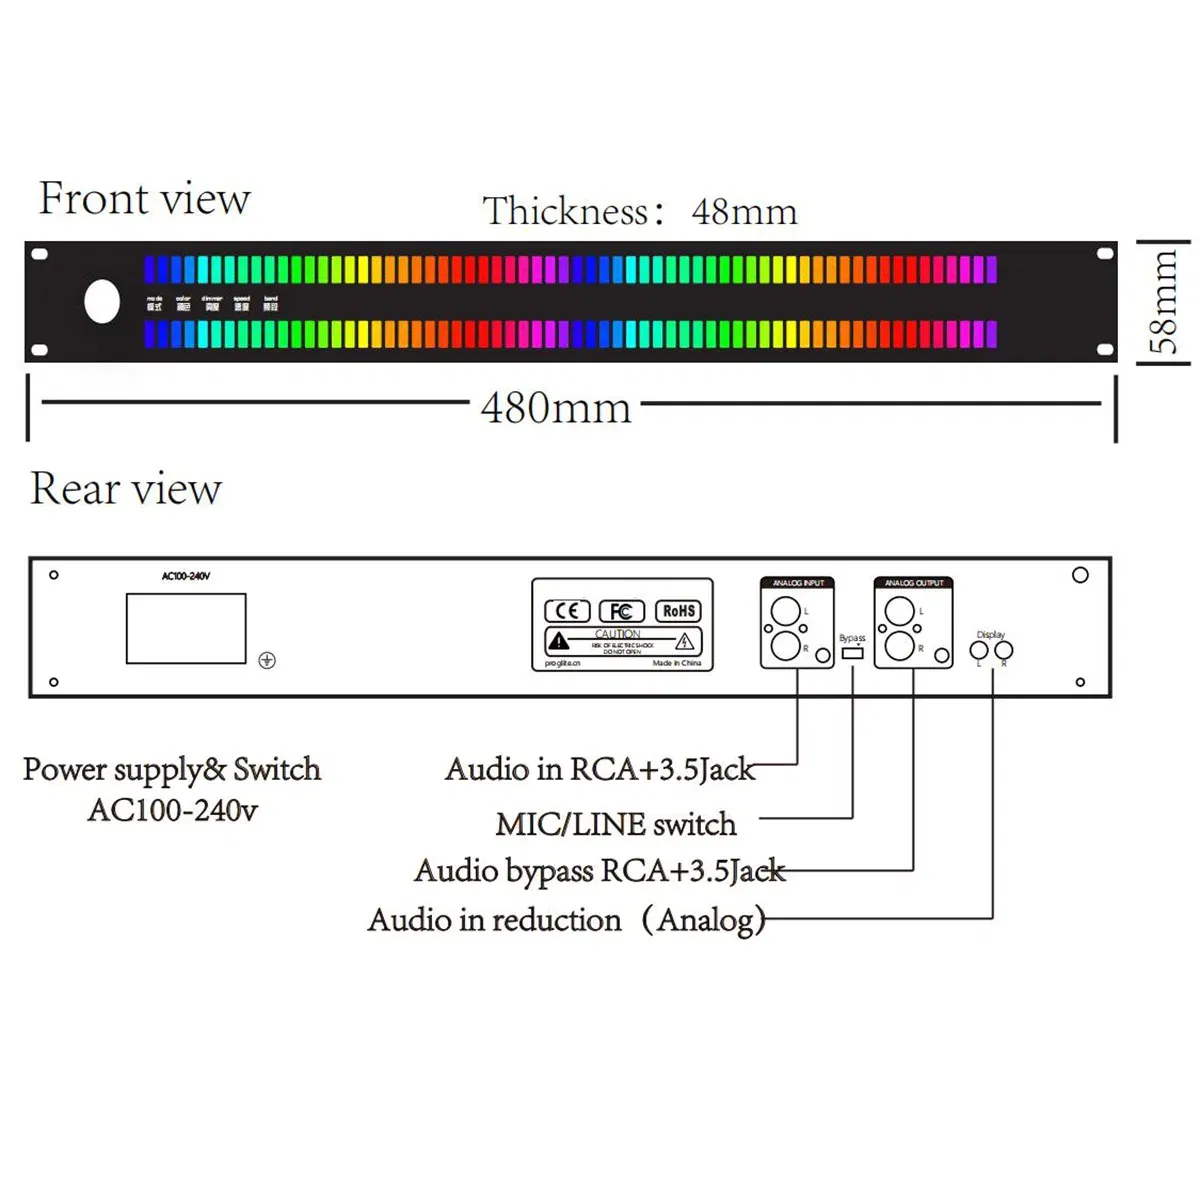
Origin: Mainland ChinaCompatible Audio & Video Equipment Style: SpeakersCompatible Audio & Video Equipment Style: AmplifierCompatible Audio & Video Equipment Style: Professional Audio EquipmentCompatible Audio & Video Equipment Style: Stage EquipmentCompatible Audio & Video Equipment Style: Recording EquipmentCompatible Audio & Video Equipment Style: Display EquipmentDisplay Size: 43Package: NoSize: Voice/wire Control InductionWeight: LED Spectrum display MeterModel Number: Music Level Indicator LightLevel Indicator Light: LED Spectrum display MeterSignal Melody Rhythm: Ambient lampChoice: yesMusic Level Indicator (Professional Edition)This device adopts digital processing technology and is equipped with an ARM 32-bit Cortex-M3 core CPU to drive 128 full color LEDs for dynamic display of music and sound fields. Built-in noise reduction processing, gain adjustment of input and output, support for switching between MIC input and line input, and support for switching mode, color, brightness, speed, andfrequency band in the display section. The operation is simple, and all operations only require an encoder knob or a remote control. The operation is real-time and effective . This device supports global voltage and is very suitable for use in commercial and professional settings.Product Features:》11 modes of stereo input》One-button shuttle or remote》Color/Brightnes/Speed/Gain/Bandadjustment》size:480*58*48 mm(L*W*T)》Weight:1000g》64 LEDs / Channel》Low, medium, and high band filteringElectrical Characteristics:》Voltage:AC100-240V》Maximum current:0.5A》Frequency response:50Hz-18KHz》Pickup sensitivity:>-40dB (@1KHz)》Input impedance:20kInstructions:PowerOn——After the AC socket on the back is plugged in, press the power switch next to it. If it was turned off by remote control last time, it needs to be turned on by remote control once;Power Off——The power switch on the back can completely shut down the deviceThe power button of the remote control can enter the standby mode, and press it again to start the machine immediately;Adjustment parameters——1.Short press the knob to enter the display menu options, select mode, color, brightness, speed, and frequency band;2.Rotate the knob to adjust the value. The upper LED segments the total number of values, while the lower LED displays the effect;3.Double-click the knob to close the menu immediately, or you can wait 10 seconds for the menu to close automatically;4.Turn the knob to adjust the gain (digital mode) when the option is not displayed;optionMODE——Display mode selection:1:Ordinary music level;2:On the basis of mode 0, add a peak at the top, and decrease after a delay;3:Similar to 1, but the peak moves away from the bottom direction;4:Flowing light, x-axis represents time, color represents amplitude;5:Similar to 0,From both sides to the middle;6:As above,with the peak;7:Similar to 5,Middle to both sides;8:As above,with the peak;9:All lights turn on together, with a brightness of amplitude. The higher the amplitude, the brighter the lights;10:Opposite to the above;11:All lights turn on together, and the color changes with amplitude;COLOR——19 colors available;DIMMER——Brightness ,6 levels of brightness from bright to dark;SPEED——Speed setting, five levels of speed, from slow to fast;BAND——Frequency band settings; The sequence is: full frequency range, low frequency (50-300Hz), intermediate frequency (300-2kHz), high frequency (2k-18kHz)About Gain Adjustment:This device has two adjustable gains:1. The fine-tuning potentiometer on the back of the device can independently adjust the input attenuation for the two audio channels, belonging to analog input attenuation adjustment;2. During normal display, the knob can adjust the magnification inside the device, and the two channels can be adjusted synchronously, with a range of 0-32, belonging to digital adjustment;Adjustment method:Using line input, first turn the panel knob to the left for more than 2 laps, then turn it to the right for half a turn. At this point, the gain is approximately 6-8. Adjust the knob on the back until the display dynamic range is satisfactory.The back knob is factory default at the center.Notice:1.Do not connect to a power supply higher than 240v, otherwise the board may be damaged, please use the power cord certified by the relevant agency;2.Do not immerse in water, or use under the condition of humidity higher than 90%3.Do not use any solvents or liquids to wipe the screen except absolute alcohol;4.Do not disassemble by yourself. Product failures caused by non-quality problems are not covered;5.Don't give to children;6.After the function changes without notice;
The product may be provided by a different brand of comparable quality.
The actual product may vary slightly from the image shown.
Shop amazing plants at The Node – a top destination for plant lovers


.jpg)


.jpeg)


.jpeg)


.jpeg)


.jpeg)


.jpeg)

.jpeg)

.jpeg)
.jpeg)


.jpeg)
.jpg)

.jpeg)


.jpeg)
.jpeg)


.jpeg)


.jpeg)

.jpeg)

.jpeg)

.jpeg)
.jpeg)


.jpeg)
.jpeg)
.jpeg)


.jpeg)


.jpeg)


.jpg)
.jpeg)


.jpg)


.jpeg)


.png)


.png)